To make nail designs with a dotting tool, start with a clear base coat. Then, use complementary colors to create patterns and seal with a top coat.
With practice, you can achieve various designs by adjusting pressure and dot sizes. Dotting tools are versatile and easy to use for beginners, allowing for endless creativity in nail art. Whether you’re a nail art enthusiast or trying it for the first time, dotting tools offer a fun and simple way to express your style.
Get inspired by different designs and techniques to create unique and beautiful nail art that showcases your creativity and skills.

Credit: m.youtube.com
Introduction To Nail Art With A Dotting Tool
If you’re a nail art enthusiast or looking to add a creative touch to your manicures, the dotting tool is an essential instrument to have in your arsenal. This versatile tool allows for the creation of intricate and professional-looking nail designs, making it a must-have for anyone interested in experimenting with nail art. Whether you’re a beginner or an experienced nail artist, the dotting tool offers endless possibilities for creating stunning nail designs.
Benefits Of Using A Dotting Tool
Using a dotting tool for nail art designs comes with a range of benefits that make it an indispensable tool for nail artists. Some of the key advantages of using a dotting tool include:
- Ability to create precise and uniform dots of various sizes
- Effortlessly achieve intricate designs such as flowers, geometric patterns, and abstract art
- Enhances creativity and allows for the exploration of different nail art techniques
- Provides greater control and precision compared to using a brush or other improvised tools
- Allows for easy experimentation with different colors and textures
Basic Tools Required For Nail Art Designs
Before delving into the world of nail art with a dotting tool, it’s essential to have the basic tools at your disposal to ensure a seamless and enjoyable nail art experience. Some of the essential tools for creating stunning nail designs include:
- Nail polish: A variety of colors and finishes to suit your design preferences
- Base coat and top coat: Ensure longevity and protection for your nail art
- Dotting tool: Available in different sizes to accommodate various design requirements
- Nail polish remover and cotton pads: For cleaning up any mistakes and maintaining precision
- Nail art brushes: Useful for creating fine details and intricate designs
- Nail tape or stencils: Aid in achieving clean lines and geometric patterns
Setting Up Your Workspace
Learn how to make nail designs with a dotting tool by following step-by-step instructions. With a few complementary colors and a clear base coat, you can create stripes and dots in various sizes and shapes. Check out YouTube tutorials for more inspiration and tips on using a dotting tool for nail art.
Choosing The Right Environment
Find a well-lit, comfortable spot with good ventilation to work on your nail designs.
Essential Supplies For Dotting
- Dotting Tools: Ensure you have a variety of sizes for different designs.
- Nail Polish: Have a selection of colors for your creative designs.
- Cotton Pads: Use these to clean your dotting tools between colors.
- Base Coat and Top Coat: Essential for a polished finish.
Basic Techniques For Dotting
How To Hold The Dotting Tool
When using a dotting tool for nail designs, it’s essential to hold it like a pen or pencil. Grip the tool firmly but gently, ensuring that it feels comfortable and steady in your hand. This grip allows for better control and precision when creating nail art designs.
Creating Perfect Dots
To achieve perfect dots with a dotting tool, dip the rounded tip into the nail polish and ensure it’s evenly coated. Then, gently press the tool onto the nail, making sure not to apply too much pressure. Lift the tool straight up to avoid smudging the dot. Practice creating dots of various sizes to add versatility to your nail designs.
Credit: www.cosmopolitan.com
Simple Dot-based Designs
Welcome to the world of nail art, where a simple dotting tool can transform your nails into stunning works of art. In this section, we’ll explore some simple dot-based designs that you can create using a dotting tool. Whether you’re a beginner or a seasoned nail art enthusiast, these designs are easy to master and perfect for adding a touch of creativity to your manicure.
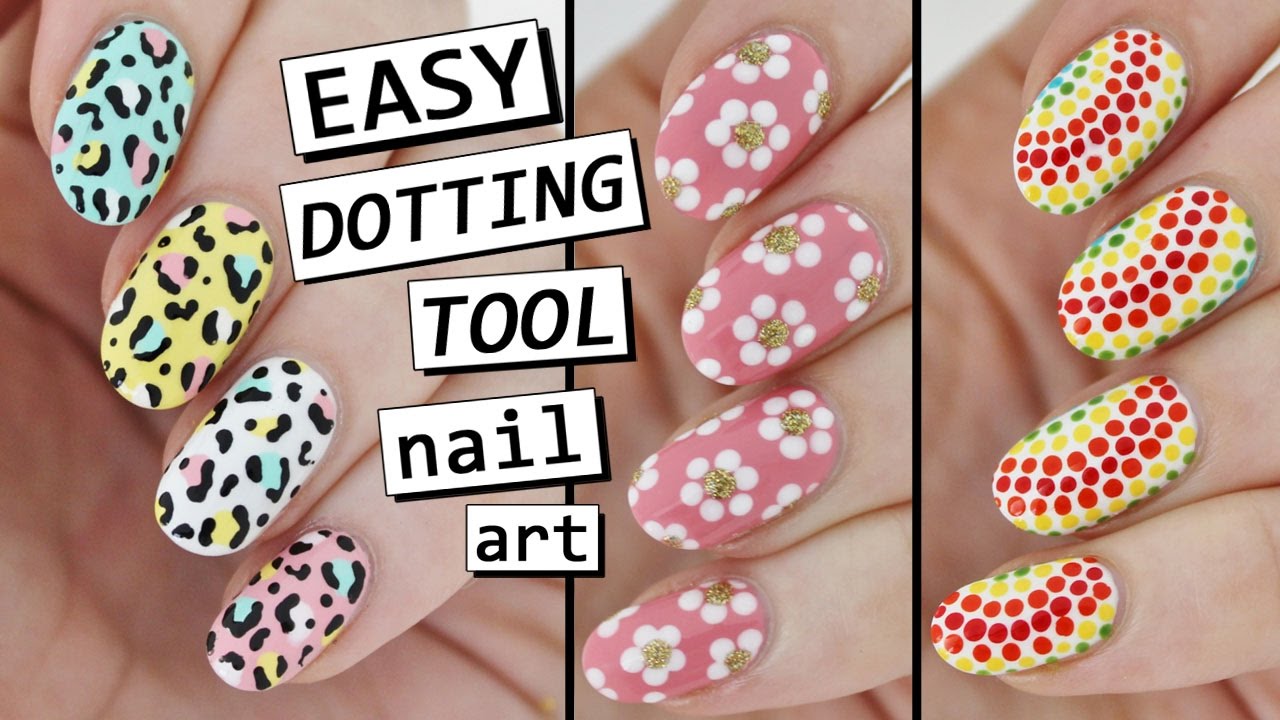
Polka Dots
Polka dots are a classic and timeless nail design that never goes out of style. With a dotting tool, you can easily create perfectly round polka dots in various sizes. For a playful look, consider using bright and bold colors, or for a more understated vibe, opt for neutral shades. You can create a scattered polka dot pattern or line them up neatly for a more organized look. The possibilities are endless with this versatile design.
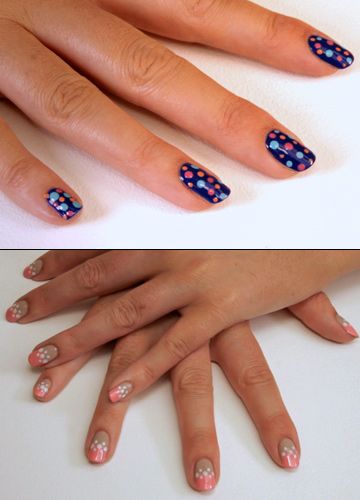
Gradient Dots
Gradient dots add a beautiful ombre effect to your nails, giving them a subtle and elegant look. With a dotting tool, you can effortlessly blend different shades of the same color to create a stunning gradient effect. Start with the lightest shade at the base of your nail and gradually transition to the darkest shade towards the tip. This design is simple yet sophisticated, making it perfect for any occasion.
Advanced Dotting Techniques
Advanced dotting techniques can take your nail art to the next level, allowing you to create intricate designs with ease. By mastering these techniques, you can achieve professional-looking nail designs that are sure to impress. In this section, we will explore two advanced dotting techniques that will elevate your nail art game: creating shapes with dots and blending colors with dotting.
Creating Shapes With Dots
One of the most impressive ways to use a dotting tool is by creating intricate shapes with just a few simple dots. By strategically placing dots of varying sizes and colors, you can form a wide range of shapes, from simple geometric patterns to more elaborate designs such as flowers, hearts, and stars. To create a flower, for example, start by placing a larger dot in the center and then surround it with smaller dots to form the petals. Experimenting with different arrangements and colors will allow you to unleash your creativity and produce stunning, one-of-a-kind nail art designs.
Blending Colors With Dotting
Blending colors with a dotting tool can produce beautiful, gradient effects that add depth and dimension to your nail designs. To achieve this, simply dip the dotting tool into two or more complementary colors and gently dot them onto the nail, overlapping the colors to create a seamless blend. This technique can be used to create ombre effects, gradient patterns, or colorful accents that will make your nail art stand out. With a bit of practice, you can master the art of blending colors with a dotting tool and unlock endless possibilities for unique and eye-catching nail designs.
Theme-based Nail Art Ideas
Creating theme-based nail art designs can add a fun and creative touch to your overall look. Whether it’s seasonal designs or event-specific ones, using a dotting tool can help you achieve intricate and eye-catching nail art. Let’s explore some exciting ideas to get you inspired!
Seasonal Designs
When it comes to seasonal nail art, the possibilities are endless. Embrace the spirit of each season with your nail designs using a dotting tool. Here are some ideas to consider:
- Spring: Create delicate floral patterns using pastel shades for a fresh and vibrant look.
- Summer: Opt for bright and bold colors to paint playful patterns like beach balls, sunglasses, or tropical fruits.
- Fall: Experiment with warm hues like deep reds, oranges, and browns to depict autumn leaves, pumpkins, or cozy plaid designs.
- Winter: Capture the essence of winter with snowflakes, snowmen, or festive motifs using icy blues, whites, and sparkly accents.
Event-specific Designs
Customizing your nail art according to specific events or occasions can be a delightful way to express your creativity. Here are some event-specific nail art ideas to explore:
- Weddings: Elegantly embellish your nails with intricate lace patterns, floral details, or classic French tips for a timeless bridal look.
- Holidays: Whether it’s Valentine’s Day, Halloween, or Christmas, embrace the holiday spirit with themed nail art featuring hearts, spooky motifs, or festive symbols.
- Birthday Parties: Add a pop of fun to your nails with vibrant colors, confetti designs, or personalized nail art to celebrate a special birthday.
- Festivals: For cultural celebrations, adorn your nails with traditional patterns, vibrant colors, and symbolic elements that represent the essence of the festival.
Troubleshooting Common Issues
Create stunning nail designs with a dotting tool by mastering common troubleshooting issues. Experiment with different colors and techniques for flawless nail art results every time. Master the art of dotting to achieve professional-looking designs effortlessly.
Fixing Smudged Dots
If you notice smudged dots, let the polish dry completely before attempting to fix them. Use a clean dotting tool to carefully cover the smudged area with a fresh dot. Ensure the new dot is slightly larger than the smudged one to conceal it effectively.Dealing With Dry Polish
To combat dry polish, place a small amount of nail polish remover on a cotton ball and gently wipe the tip of the dotting tool. This will help revive the polish and make it easier to create smooth and precise dots on your nails.Maintaining Your Nail Art
When it comes to maintaining your nail art, it’s essential to take the right steps to ensure your designs stay vibrant and flawless for as long as possible. Here are some tips and tricks for protecting your nail art and maximizing its longevity.
Protecting Your Designs
Protecting your nail art designs is crucial to maintaining their beauty. After creating your stunning nail designs with a dotting tool, it’s important to apply a durable top coat to seal and protect the intricate artwork. A high-quality top coat not only adds a glossy finish to your nails but also acts as a protective barrier, preventing chipping and fading of the designs.
Longevity Tips For Nail Art
Ensuring the longevity of your nail art requires some simple yet effective practices. Firstly, avoid exposing your nails to harsh chemicals and excessive water, as these can cause the designs to deteriorate. Additionally, wearing gloves while doing household chores can help protect your nail art from damage.
To further prolong the lifespan of your nail designs, consider applying a fresh layer of top coat every few days to maintain the shine and integrity of the artwork. This simple step can significantly extend the longevity of your nail art.

Credit: bigceelittlecee.com
Frequently Asked Questions
How To Make Nail Art Dotting Tool?
To make a nail art dotting tool, use a toothpick or bobby pin for small dots. Dip in polish and create designs on nails.
What Can I Use To Make Designs On My Nails?
To make designs on your nails, use a nail painting brush and 3-6 colors. Apply stripes in alternating colors over a clear base coat, then seal with a top coat. A set of nail art brushes with a soft grip can make it easier.
How To Make Stars With A Dotting Tool?
To make stars with a dotting tool, start by creating five dots in a star shape. Connect the dots carefully to form a star design on your nails.
How To Do Nail Art At Home With Tools?
To do nail art at home with tools, you can use a nail painting brush and three to six complementary colors. After applying a clear base coat, draw stripes onto your nails in alternating colors, then seal with a top coat.
You can also use a dotting tool to create dots or stars, or try other designs using various sizes of dotting tools. Check out online tutorials for step-by-step guidance.
Conclusion
To sum up, mastering nail designs with a dotting tool opens up a world of creativity. Experiment with different colors and patterns to create unique nail art. Practice makes perfect, so keep refining your technique for stunning results. Let your creativity shine through your fingertips!